教程参考 https://github.com/lyc8503/UptimeFlare/wiki https://github.com/caronc/apprise/wiki
## 准备工作
## 搭建
### 获取 Cloudflare Workers API Token
到[这里](https://dash.cloudflare.com/profile/api-tokens)获取 API Token
[upl-image-preview url=https://s.rmimg.com/2024-08-18/1723950592-174473-image.png]
[upl-image-preview url=https://s.rmimg.com/2024-08-18/1723950614-845802-image.png]
[upl-image-preview url=https://s.rmimg.com/2024-08-18/1723950671-79236-image.png]
`所有账户`就可以,也可以只给特定账户的权限
[upl-image-preview url=https://s.rmimg.com/2024-08-18/1723950713-267815-image.png]
>`所有区域`就可以,也可以只给特定区域的权限
[upl-image-preview url=https://s.rmimg.com/2024-08-18/1723950806-795615-image.png]
[upl-image-preview url=https://s.rmimg.com/2024-08-18/1723950937-15280-image.png]
API令牌就在这了,留着这个页面或把它复制到别处去,不会再显示了
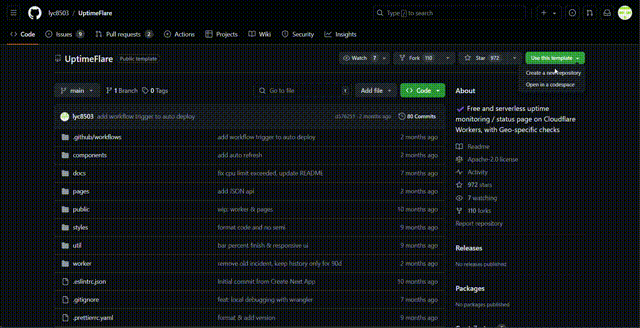
### 设置仓库
repo:https://github.com/lyc8503/UptimeFlare
Use Template 然后创建新仓库即可

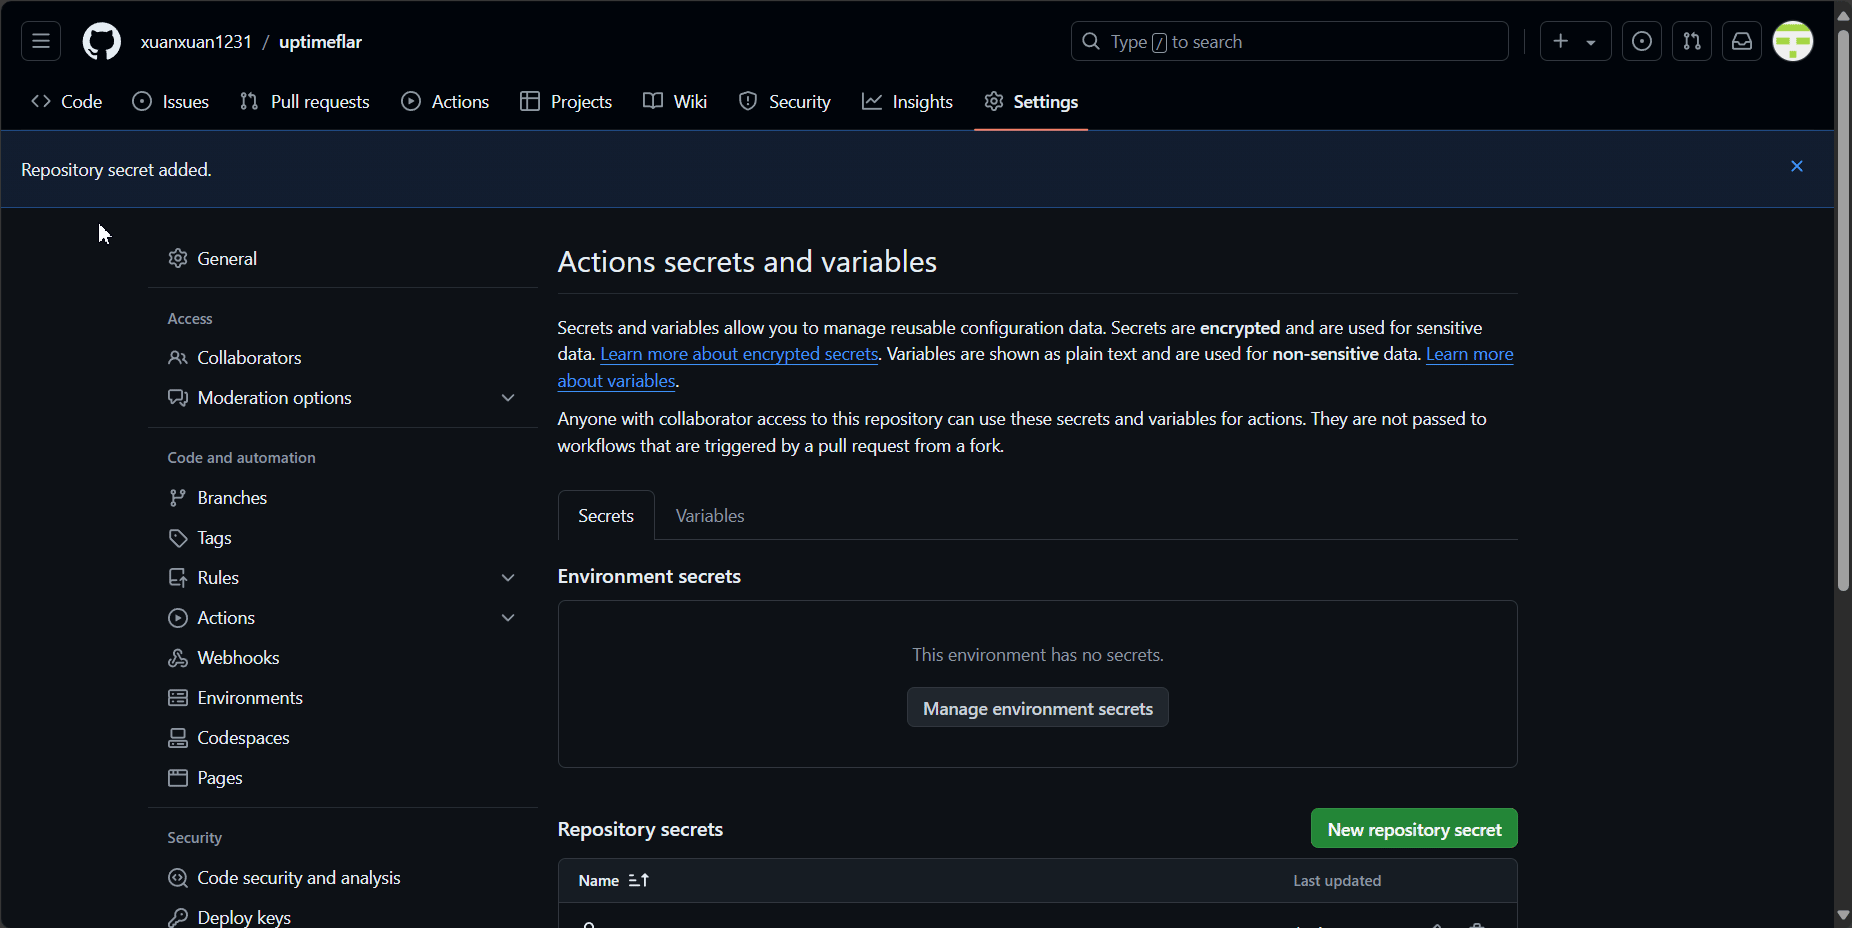
### 设置 API Token
将上面获取到的 API Token 添加到 Actions Secret `CLOUDFLARE_API_TOKEN`


### 部署
现在可以选择 更改配置文件 或 直接部署
我们将在后面更改配置文件,所以现在手动触发 `Deploy to Cloudflare` workflow

等待部署完成即可
[color=red]注意:如果第一次部署失败,一定要在第二次部署之前把 pages,workers和kv存储删掉[/color]
### 访问
Workers 和 Pages
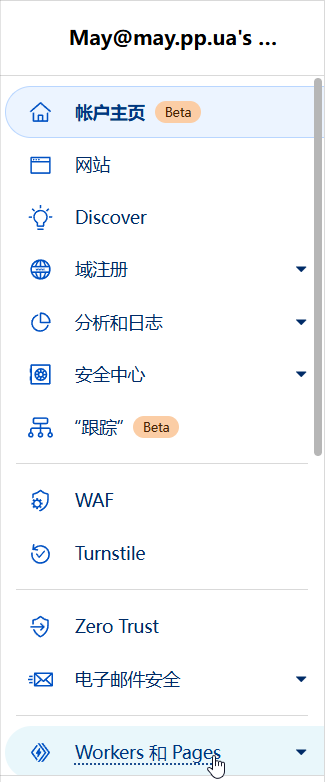

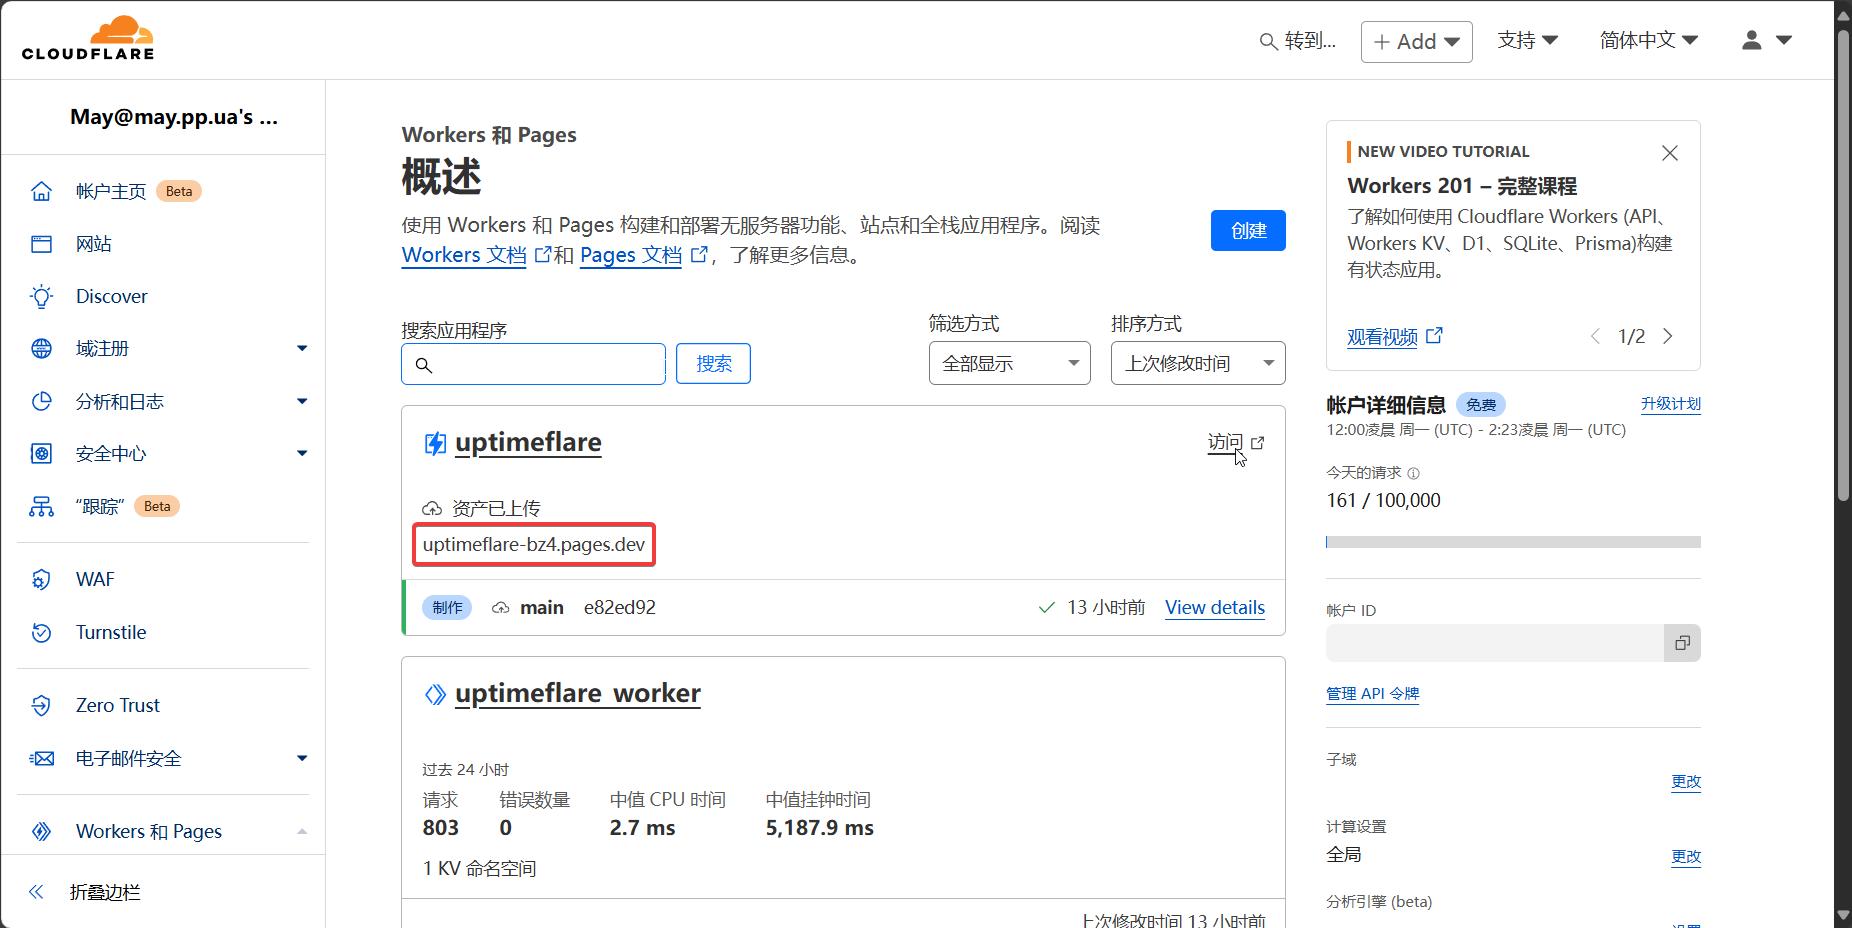

可以查看到域名,或者直接访问
### 自定义域名(可选)
Pages 自定义域


## 自定义配置文件
UptimeFlare 的配置文件使用 TypeScript,使用 `//...` `/*...*/` 作为注释,别忘了加 `,`
### 页面
配置位于 `pageConfig`
```typescript
  // 页面标题
  title: "lyc8503's Status Page",
  // 页面顶部显示的链接,可以将 `highlight` 设置为 `true`
  links: [
    { link: 'https://github.com/lyc8503', label: 'GitHub' },
    { link: 'https://blog.lyc8503.net/', label: 'Blog' },
    { link: 'mailto:[email protected]', label: 'Email Me', highlight: true },
  ],
// …

```
### 监控
配置位于 `workerConfig.monitors`
#### HTTP
```typescript
// Example HTTP Monitor
    {
      // `id` 唯一,如果留空的话就是上一个
      id: 'foo_monitor',
      // `name` 页面和通知显示的名称
      name: 'My API Monitor',
      // `method` 有效的 HTTP 方法
      method: 'POST',
      // `target` 有效的 URL
      target: 'https://example.com',
      // [可选] `tooltip` 类似提示文字,只是在光标悬停在名称上时显示
      tooltip: 'This is a tooltip for this monitor',
      // [可选] `statusPageLink` 只用于链接
      statusPageLink: 'https://example.com',
      // [可选] `expectedCodes` 允许的 HTTP 响应码的数组,不设置的话就是 2xx
      expectedCodes: [200],
      // [可选] `timeout` 单位为 毫秒 ,默认为 10000
      timeout: 10000,
      // [可选] 请求头
      headers: {
        'User-Agent': 'Uptimeflare',
        Authorization: 'Bearer YOUR_TOKEN_HERE',
      },
      // [可选] 请求体
      body: 'Hello, world!',
      // [可选] 如果设置,响应必须包含该关键词才会被判定为可用
      responseKeyword: 'success',
      // [可选] 如果设置,检查将在设置的地点运行
      // 设置之前先看看 https://github.com/lyc8503/UptimeFlare/wiki/Geo-specific-checks-setup
      checkLocationWorkerRoute: 'https://xxx.example.com',
    },
```
#### TCP
```typescript
// Example TCP Monitor
{
id: 'test_tcp_monitor',
name: 'Example TCP Monitor',
// 对于 TCP 监控,`method` 使用 `TCP_PING`
method: 'TCP_PING',
// 对于 TCP 监控,`target` 使用 `host:port`
target: '1.2.3.4:22',
tooltip: 'My production server SSH',
statusPageLink: 'https://example.com',
timeout: 5000,
},
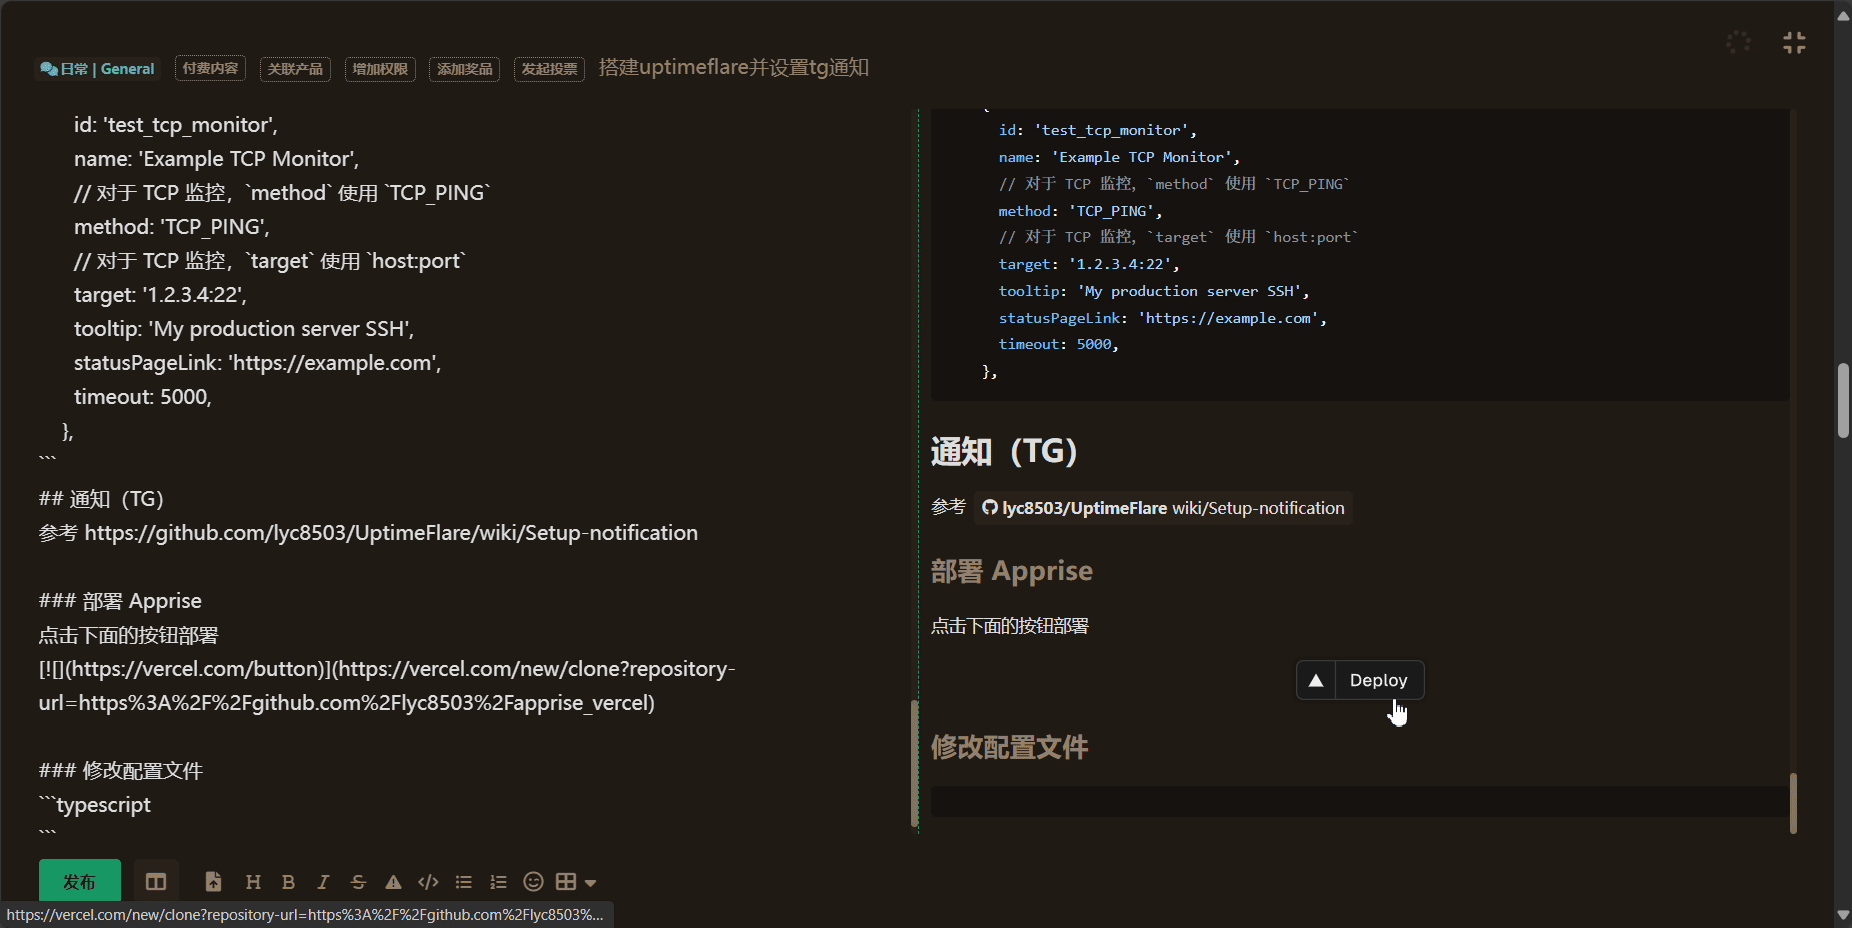
```## 通知(TG)
参考 https://github.com/lyc8503/UptimeFlare/wiki/Setup-notification https://github.com/caronc/apprise/wiki/Notify_telegram
此处建议把 repo 改为 private,以免 TG 机器人 Token 泄露
### 创建 TG 机器人
[BotFather](https://t.me/BotFather)
`/start`
`/newbot`
自定义机器人名称和用户名,用户名以`bot`结尾
然后回给你 HTTP API Token,留好
### 部署 Apprise
点击下面的按钮部署,可以配置自己的域名
[](https://vercel.com/new/clone?repository-url=https%3A%2F%2Fgithub.com%2Flyc8503%2Fapprise_vercel)

可以用 域名/notify 测试,正常情况下应出现
```text
Apprise Vercel is working, use POST method to send notifications.
```
### 修改配置文件
配置位于 `workerConfig.notification`
```typescript
// Apprise API 地址(即上面 Vercel 部署的地址)
appriseApiServer: "https://apprise.example.com/notify",
// Apprise 要发送信息的地址,具体看看 https://github.com/caronc/apprise
// 如果只是想给自己发信息,ChatID 可以省略,参考 https://github.com/caronc/apprise/wiki/Notify_telegram#chat-id-conundrum
recipientUrl: "tgram://bottoken/ChatID",
// [可选] 信息中的时区,默认为 "Etc/GMT"
timeZone: "Asia/Shanghai",
// [可选] 单位为 分钟,故障时先等这么长时间再发送消息
// 只有在监控从首次失败开始持续掉线才会发送信息
// 如果不设置,信息将立即发送
gracePeriod: 5,
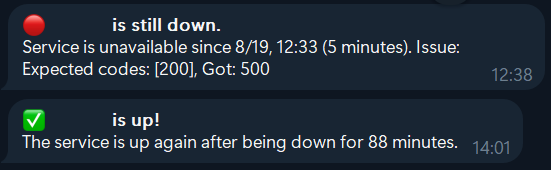
```### 掉线时发送的消息